The human eye is significantly superior to any, even the most advanced camera. Therefore, the colors and shadows seen by the eye are very different from the image on the camera. Looking at each other, we do not pay attention to the redness on the skin, bags under the eyes, tummy tummy, sticking out strands of hair. However, it is very noticeable in the frame.
Photos are retouched to eliminate imperfections. When retouching a female portrait, we strive for a fragile image, perfect skin, luxurious hair and rejuvenation. But a male portrait should leave the impression of masculinity, so it should not completely remove wrinkles or create perfect skin.
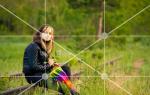
Let's take a step-by-step look at one of the ways to retouch a male portrait. The photo was provided by photographer, organizer of expeditions to exotic places of the world Alexander Permyakov. The portrait was taken on a Nikon camera. Retouching was carried out in Russified Adobe Photoshop CC 2017.
NIKON D7000 / Nikon AF Nikkor 50mm f/1.8D SETTINGS: ISO 100, F1.8, 1/50 s, 75.0 mm equiv.
Many photographers are against retouching, arguing that a photo can look beautiful without any processing. Well, in our case there is a good cut-off pattern in the frame. But the portrait lacks a few touches to make it perfect. You need to even out the skin tone (get rid of redness) and remove excess spots on the face, enhance the highlights (they emphasize details), lighten the dark part a little, add sharpness. It is more difficult to highlight dark fragments if the shooting was done in low light - noise may appear. However, Nikon cameras shoot with minimal noise even in difficult lighting conditions. If noise does appear, it is monochrome, comparable to film. This makes it easier to work with when lightening shadows in photographs, and it is easier to highlight dark areas without unpleasant noise and loss of detail.
Let's get started!
Open the photo in Photoshop. Be sure to make a copy of the layer (Ctrl + J) and work with it. This will allow, in case of failure, to quickly recover losses or simply compare the results before and after processing. Enlarge the image to 100% (key combination Ctrl and + to enlarge, Ctrl and - to reduce).

We carefully examine the skin to understand what defects need to be eliminated. This photo shows the stains that we will get rid of first.

You can use several tools, but in this case the Healing Brush Tool is more suitable.

Select the appropriate brush size and click to remove all unnecessary stains. The size of the brush can be adjusted using the keys in the letter part of the keyboard: “x” - decrease, “ъ” - increase. In the brush settings, set the “Source” parameter to “Sample.” (Sample), Mode (Mode) - “Normal” (Normal). Leave Hardness at 100%.

Move the brush cursor to the area that we will paint over, and, holding down the Alt key, select a healthy area of skin suitable for replacement. This way we get a sample of the area with which we will paint over the defect.

At the moment of painting, the cross will indicate the source. We remove all unnecessary stains and rashes.
Result of painting the spots:

The next step is to eliminate redness and even out skin tone.
Absolutely everyone has redness. If the skin was not toned with makeup before shooting, there will definitely be red spots in the photo. In the case of a female portrait, things are simpler: women usually apply makeup before shooting. But not every man will agree to fall into the hands of a makeup artist.
The photo shows areas of skin with uneven tone (redness):

Create an adjustment layer with the “Hue/Saturation” effect. You can call it in the lower right corner on the toolbar under layers.

You will have a new layer and the effect control window will open.

Go to the red channel, click on the eyedropper, and then on the area of redness that we want to get rid of.

You will then see a shift in the spectrum.

Raise the saturation and hue to approximately 70–73.

By moving the checkers along the gradient, we ensure that the coverage is not all over the skin, but only in those areas where you want to remove redness.

We reset the saturation to zero and move the color tone until we see the desired effect. In my case it is +15.


Now we need to return the natural color of the lips, since the pink tint has disappeared along with the redness. To do this, select the “Brush” tool, set the color to black, select the desired size and paint over the lips with a brush, remaining on the “Hue/Saturation” adjustment layer.

Result:

Now we need to return the details and highlights lost during processing.
To do this, create a new layer (Ctrl + Shift + N). Let's switch to the "Channels" layout of this layer.

Here the image is divided into channels. Turn off each channel one by one (click on the eye to the left of the image icon). Our task is to choose the most contrasting channel. Obviously it is blue, it retains more detail.

Create a duplicate of the blue channel (select it and select “Create a duplicate channel” with the right button). Next we work with a copy of the blue channel. All other channels should be invisible. We stand on a copy of the blue channel and press the key combination Ctrl + l. The Channel Levels window appears.

Drag the input value checker a little to the right and click Ok. This will enhance the contrast.

Now let's select only the light areas of the channel. To do this, hold down the Ctrl key and click on the icon of your blue channel. You will see dotted highlights in the light areas. It may seem that not everything is selected, but rest assured, all the light areas are actually selected.

Go to the “Layers” layout and create a new one (Ctrl + Shift + N). At the same time, your selection of light areas is preserved (dotted lines are visible).

Select the Brush tool, set the color to white and paint on a new layer. You can paint everything or those places where you want to increase the brightness of the highlights. White color will only appear on light areas of the image. If you plan to paint everything, keep the brush diameter large.

Below is the result. Notice how the details have changed. Try turning the visibility of the bottom layer off and on by holding down the Alt key. This way you will see the picture before and after processing.
In the photo, arrows indicate some areas where the details have become more expressive. For comparison: in the “before” option there is an arrow on the background, after processing it also became lighter.

If you want the highlights to be lighter, lower the opacity of the highlights layer to the desired result.
You may find this method of enhancing highlights difficult because on a new layer you can simply paint white highlights with a brush and blend them out. But it will look rough, the glare will be unnatural. I propose to enhance only those highlights that were captured by the camera.
The final touch is sharpening. Select all layers and press the key combination Shift + Ctrl + Alt + E. This way we will combine all layers with effects into a new layer. Now duplicate the resulting layer and apply the High Pass filter to it.

In the window that opens, move the checker to the right until details appear in the image (look at the main image, and not at the fragment in the settings window).

That's all! Try, experiment, share your experience in the comments.
How to process a street portrait using Adobe Photoshop - watch the video tutorial by Alexey Kuzmichev. “Let’s start processing a street portrait of an elderly man. From the lesson you will learn how to achieve beautiful cinematic shades in a photo, as well as how to emphasize the necessary details using light and shadow" © Alexey Kuzmichev Information about the video Source: video tutorials on Photoshop from Alexey […]
How to retouch a man's portrait in Adobe Photoshop - watch the video tutorial by Alexey Kuzmichev. “Today I will show you how to process a male portrait in Photoshop. You will learn what nuances there are when retouching male photographs, techniques for enhancing skin texture and ways to make the model in the frame more brutal.” © Alexey Kuzmichev Information about the video Source: video tutorials on Photoshop […]
How to make a professional retouching of a female portrait using Adobe Photoshop - watch the video tutorial by Alexey Kuzmichev. “Retouching is a very important stage in the processing of any photograph. Before tinting a photo, adding effects, etc., we first need to get rid of the main defects, otherwise in the future they can ruin all our work. Today I will show you the whole process [...]
Retouching photographs is of great importance, not because the original image is poorly executed, but in order to hide minor defects and correct the color balance. Retouching a man's photograph differs from a woman's one in that there is no need to hide wrinkles and make the skin perfectly smooth, but at the same time it has its own characteristics.
Create a “Black and White” adjustment layer. We increase the brightness of some individual areas where the dominant color is red and yellow tones, moving the cursor towards their thickening.
Change the blending mode of this layer to “Soft Light”.
Create a Hue/Saturation adjustment layer and reduce the saturation.

Create a Photo Filter adjustment layer and give the image some warmth, but not too much, so yellow will do. You can set the filter density.

In order to give the image a brutal look, you can create a “Color Search” adjustment layer and select the desired color scheme.

If the skin has become too warm in tone or has acquired red tones, you can cool it down with a blue Photo Filter adjustment layer.

Using the Curves adjustment layer, you can lighten and darken certain areas of the image.

We combine the adjustment layers into a group: in the layers tree, select the desired layers and press the key combination Ctrl + G. Reduce the opacity of the group to 72%.

Create a copy of the image layer and use the Spot Healing Brush tool to smooth out the wrinkles on the forehead, cheeks and under the eyes. The nasolabial folds can be left untouched. The tool is used as follows: hold down the Alt key and click with the mouse on the area of the skin that is a template for the area that needs to be changed. We pass the brush over the area that needs to be corrected.
We continue our series of articles entitled. This time I will show you one of my options editing a man's portrait. The motive for this article was simply great amount processing lessons that have filled our entire Internet :)
In this lesson we will look at the main details that you should pay attention to when retouching a man's photo.
For this article I selected photograph of his friend, taken in February 2012. It was filmed on Nikon D7000 With NIKON lens. Original photo and PSD the file is located at the end of this article, on which you can practice and completely repeat this photo processing. As always, processing video you will also find at the bottom of this article.
Actually, the result before:
and the result after:

To perform this processing we need a graphic editor Adobe Photoshop and plugins for it: Alien Skin Exposure 3, Color Efex Pro versions 3.0 And 4.0 ,Imagenomic Noiseware Professional. Links to download these plugins are at the end of the article.
Beginning of work
1. Open our photo in Photoshop and immediately go to the plugin Color Efex Pro 3.0, select a filter Contrast Only and set the following settings: Brightness +40%, Contrast +40%, Saturation +50%

In this lesson we will talk about how to process a male portrait in order to accurately convey the character of the person in the picture and enhance the element of brutality.
Introduction
Processing a male portrait is often more difficult than working on a female portrait. When editing a portrait of a girl, as a rule, the photographer strives to make beautiful picture. When working with a male portrait, this goal loses its importance, giving way to conveying the character and mood of the hero. And for this, in addition to knowing how to remove pimples and wrinkles, it is useful to know something else.
Step 1
The first step is to treat the eyes, as in. This action will help you solve a focusing problem that may not have hit your eyes exactly.
Step 2
Let's sharpen the image using the Unsharp mask filter. You can find it in the Filters/Sharpening/Unsharpening menu.
You can set the values to your taste or use those shown below in the illustration. By the way, the values very much depend on the resolution of the photo, in our case it is 3500x5200px.
Increase sharpness using the Unsharp Mask filter
Step 3
Create a “Gradient map” layer and reduce its opacity to about 36%. Nothing changes in the settings menu that appears when creating a Gradient Map. Change the layer blending parameters from “normal” to “saturation”.

Step 4
Create a Hue/Saturation adjustment layer. In the drop-down window, change the set to “Custom” and increase the “Saturation” value by 22 and “Brightness” by 2.

Create a Hue/Saturation Adjustment Layer
Step 5
Create a copy of the main layer using the hot keys Ctrl+J and convert it to black and white, again using the hot key: Alt+Shift+Ctrl+B. In the drop-down menu, you can leave everything as is, or, to your taste, move the sliders along different color channels. After that, reduce the layer opacity to about 70%.
There is another option: you can set this layer to the Screen blend mode and also reduce the opacity, but to 50%.

Step 6
We create a copy of the main layer using the hotkeys ctrl+j and convert it to black and white, again using the hotkeys: alt+shift+ctrl+b. In the drop-down menu, you can leave everything as it is or, to your taste, move the sliders along different color channels. After that, reduce the layer opacity to about 70%.
Option 2: you can set this layer to the “screen” blending mode and also reduce the opacity, but to 50%.


Option 1 Result when overlaying in “normal” mode


Option 2 Result when overlaying in “screen” mode
Step 7
Create a “Brightness/Contrast” adjustment layer and increase the “brightness” values: in our case - by 24, “contrast” - by 12.

Create a “Brightness/Contrast” layer
You can stop at step 7, or you can continue and achieve a result similar to what ends up on the covers of Esquire.
Step 8
Create another adjustment layer, this time “Black and White”. Depending on the photo, we change the settings by channel, and then set the opacity value to 60-70%.

Create a “Black and White” layer and change the opacity value
Step 9
Create a “Color” adjustment layer and enter the color parameters #9990f6. After that, reduce the opacity to about 20% and change the blending method from “Normal” to “Subtract”.
The "Subtract" blending method works in the opposite way to the "Normal" blending, it removes the selected color and thus toning with blue in the "Subtract" blending mode we get a yellowish tint.

Create a “Color” layer with an opacity of ~20% and a blending method of “subtraction”

Choosing a color for tinting
Step 10
You may have problems saving the photo and Photoshop saves it in .psd format. Let me remind you that then you should select File/Save As/JPEG.
Finally, one more piece of advice: if you don’t have enough free time to process the entire photo, don’t despair and save the photo as a .psd and continue when it’s convenient for you. In this format, Photoshop saves all layers and data that were changed during processing.

Save the photo
Conclusion
Let me remind you that most of the settings given in this lesson are suitable specifically for this shot. In your workflow, you can skip or replace any actions, because photo processing is a creative process! Be creative and good luck to you!