In photography, landscape is not just shooting views and not a protocol-accurate reproduction of this or that corner of nature. No wonder they say that a landscape photographer should be not so much a botanist as a poet! And if we are talking about creating an artistic photograph, we have the right to demand from its author an accurate selection of material, a correct understanding of the material and the meaning of artistic creativity. Truthfulness, poetry, picturesqueness of the photographic image (Ivanov - Alliluyev, 1971).
An artistic landscape created by means of photography should evoke in the viewer the same deep experiences as a landscape created by means of painting. And such works corresponding to these high requirements, there is a lot in photography (Ivanov-Alliluyev, 1971; Levkina, 2013).
Contemporary landscape photography is very diverse. The landscape has been preserved and developed, in which its authors follow the examples of classical paintings. Here, of course, we cannot talk about mindless imitation and simple repetition of techniques and effects found by painters. Photography does not lose its independence, the specific features of modernity. But analogies in plots and visual structures still remain; they are quite obvious. Such landscapes are interesting because they develop artistic taste, demonstrate pictorial skill, and evoke associative ideas in the viewer (Ivanov-Alliluyev, 1971; Levkina, 2013).
Features of landscape photography
It is generally believed that landscapes can be photographed in all weather conditions, from bright sunshine to the flash of thunderstorm lightning, and the most important thing in landscape photography is to get up early to catch the morning light, since the morning sky is the clearest and most transparent (Harman, 2011) .
The most important feature in landscape photography is the lack of science about artistic landscape photography. There is no book in the world of photographic literature called “The Art of Landscape Photography.” The reason is simple: the art of photographic landscape is so multifaceted and complex that this science turns out to be a metascience. As written in the book by L.D. Kursky, Ya.D. Feldman’s “Illustrated Guide to Teaching Photography”: “The main feature of landscape photography is constructive. Unlike a still life, it is impossible to make any adjustments here. It is impossible, for example, to remove a mountainside that interferes with the overall composition; it is impossible to change the location of the whole. Thus, work on the composition of the plot is limited to the only method of choosing a shooting point and choosing a lens with the desired focal length. There may be many of these points, and each of them has its own peculiarity, its own individuality.” Each landscape has several plans: near, far and middle. Their appearance is associated with a reduction in the scale of objects moving into the depths of space, towards the horizon line. The comparison of the scales of linear forms is the linear perspective of a photograph (Belov, 2012).
An integral part of constructing a photograph is lighting. Light is one of the most determining sources of our sensations. It is considered as the main means of creating an artistic photographic work (Dyko, 1977).
The individuality of a landscape depends mainly on the unity and integrity that a well-chosen lighting effect gives to nature (Belov, 2012; Dyko, 1977; Wade, 1989).
Light makes it possible to see the really existing world. In this case, an important role is played by the originality and attractiveness of the lighting, as it occurs at different times of the day: at dawn, in the morning, at noon, in the afternoon, during sunset. Also, the time of year, temperature, and landscape of the area are also important when photographing. As a result, we can conclude that a landscape photographer encounters many unusual and difficult to solve problems (Belov, 2012).
First of all, the following paradox awaits him: finding himself directly at that point in space from which a stunning landscape opens up, a person with a camera experiences the powerful, diverse influence of the surrounding nature. His gaze simultaneously covers 180 degrees of perspective, and if he looks around, then all 360. In photography, perspective, as a rule, is limited to 60 degrees at focal length a standard 28 mm lens (Ilyinsky, Petunina, 1993; Belov, 2012).
Secondly, the photographer is influenced by visual, auditory and olfactory images. Something is constantly happening around: birds are singing, flowers are smelling, a stream is babbling, the wind is blowing. Tactile sensations also play an important role in general perception: under our feet we feel sharp stones, tree roots and other unevenness in the landscape, we can touch the rough or smooth bark of trees, roll a snowball out of snow in our palms (Wright, 2010; Wade, 1989).
The materiality of the landscape is clearly visible in the foreground; a meter or two from the photographer, the texture is clearly visible: blades of grass, stones, and tree leaves are drawn in detail. The paradox is that the photographic result, instead of this multitude of delightful perceptions and sensations, will be some kind of banal photograph or flat picture on the monitor, conveying only a small part of everything that was felt at the moment of shooting (Belov. 2012; Morozov, 1985).
Another of the serious difficulties that a landscape photographer faces is the disappearance of the third coordinate. In a landscape, the depth of space is usually many kilometers! And in the photograph the image is flattened and becomes two-dimensional. How to restore a three-dimensional picture of nature? Linear perspective will help us with this (Lapin, 2005).
Perspective comes from the Latin word perspicere - to look through. The principles of linear perspective were developed by many Renaissance artists. These include Leonardo da Vinci and Albrecht Durer. For example, Leonardo da Vinci established the basic principles of image reduction. The science of depicting spatial objects on a plane or any surface in accordance with those apparent reductions in their sizes, changes in shape and light-and-shadow relationships that are observed in nature. In other words, this is: a way of depicting volumetric bodies that conveys their own spatial structure and location in space
Fig. 19.

Fig.20.
A perspective on how science appeared during the Renaissance, since at that time the realistic movement in the fine arts flourished. The created system for transmitting visual perception of spatial forms and space itself on a plane made it possible to solve the problem facing architects and artists. Many of them used glass to determine perspective, on which they outlined the correct perspective image of the required objects (Lapin, 2005).
IN fine arts and photography, perspective can be used in various ways, which is used as one of the artistic means that enhances the expressiveness of images. Depending on the purpose of the perspective image, perspective includes the following types: direct linear perspective, reverse linear perspective (Morozov, 1985).
Direct linear perspective. A type of perspective designed for a fixed point of view and assuming a single vanishing point on the horizon line. Objects shrink proportionally as they move away from the foreground. Direct perspective has long been recognized as the only true reflection of the world in the picture plane. Taking into account the fact that linear perspective is an image built on a plane, the plane can be positioned vertically, obliquely and horizontally, depending on the purpose of the perspective images (Fig. 21) (Kursky, Feldman, 1981).

Fig.21.
"Birch Grove".
An example of the transfer of space in this photograph is represented by linear perspective. The path in the birch grove and the ditch become smaller and narrower proportionally as they move away from the foreground. Trees also get smaller as they move away.
Reverse linear perspective. A type of perspective used in Byzantine and Old Russian painting, in which the depicted objects appear to increase in size as they move away from the viewer; the picture has several horizons and points of view, and other features. When depicted in reverse perspective, objects expand as they move away from the viewer, as if the center of convergence of lines is not on the horizon, but inside the viewer himself. Reverse perspective forms a holistic symbolic space, oriented towards the viewer and suggesting his spiritual connection with the world of symbolic images. Since under normal conditions the human eye perceives an image in direct, and not in reverse, perspective, the phenomenon of reverse perspective has been studied by many specialists (Fig. 22) (Belov, 2012; Levkina, 2013).

Fig.22.
What role does perspective play in photography? Linear perspective plays a huge role in the work of a photographer. In photography, to obtain a linear perspective in a photograph that is close to real, lenses with a focal length approximately equal to the diagonal of the frame are used. To enhance the effect of linear perspective, wide-angle lenses are used, which make the foreground more convex, and to soften it, long-focus lenses are used, which equalize the difference in the sizes of distant and close objects (Lapin. 2005).
Despite the two-dimensional nature of photography, the sense of volume in a photograph affects its perception, so it is important to use methods of working with perspective, with which you can achieve a three-dimensional perception of a photograph (Lapin, 2005).
There are several ways in which linear perspective manifests itself in photography. All of them are based on the composition of the photograph and the characteristics of human vision (Lapin, 2005; Morozov, 1985).
One of the obvious laws of linear perspective is that objects appear smaller as we move away from them. To learn how to apply this law, it is enough to find a shooting location with repetition of objects, for example: a row of trees, pillars or a long wall, steps and railings of stairs in parks (Fig. 23) (Belov. 2012).

Fig.23.
For linear perspective to show itself in a photograph, you need to get very close to the first object in this row so that it appears huge in the photograph. If this effect is achieved, the remaining objects in the repeating row will appear significantly smaller, which will enhance the impression of depth (Fig. 24) (Lapin, 2005; Belov, 2012).

Fig.24.
Another method of expressing perspective is to use lines going deep into the photo to convey volume in the image. Objects that form two converging lines work well for this method (for example, railway). To enhance this effect, you need to choose a low shooting point. At the lowest point of the survey, the lines will appear very wide and sharply move deeper into the image to the vanishing point (Fig. 25) (Harman, 2011; Wade, 1989).

Rice. 25.
One of the best ways display linear perspective in the photo - include objects of various sizes in it. For example, from a particular shooting point, the people in the photograph will appear very small, and if they are standing at the foot of a mountain, then the viewer will understand how huge this mountain is. In the same way, you can use trees, animals, cars or other objects whose relative size compared to mountains or other spacious landscapes is very different (Kursky and Feldman, 1981, 1991).
All of these techniques are the result of the photographer's powers of observation. IN real life linear perspective is perceived due to distance. If you use different plans in a photograph, emphasizing that one of the objects is closer to the camera and the other is further away, then the picture will seem three-dimensional (Belov. 2012; Lapin, 2005).
Based on the above, we can draw the following conclusion: it is necessary to select the composition of plans when shooting in such a way that a noticeable reduction in these dimensions is visible in the frame. A good way to emphasize the expressiveness of the depth of space is to use a wide-angle lens, while the degree of reduction of objects in the frame increases sharply: the tree in the background is already sharply reduced in size, and in the third plan the object completely turns into a point. This phenomenon creates the illusion of remoteness and depth of space (Morozov, 1985; Belov. 2012; Dyko, 1977).
The next technique when photographing a landscape is to use the possibilities of color-tonal perspective and color (Wade, 1989).
Each of us is familiar with the natural phenomenon when, along with a decrease in the shapes of objects (with an increase in the distance between the object and the observer), color contrasts also decrease. Modern photographic art has reached such perfection that its best works, deep in thought, original in visual solutions, have acquired the features of true artistry. These works give reason to talk about the original handwriting of photo artists, the style of their work, about searches in the field of artistic creativity and about such an important category fine arts, like color (Buimistru, 2010; Ivanov-Alliluyev, 1971).
The concept of “color” came to photography from painting, where color refers to the nature of the relationship between all the color elements of the picture, the consistency of colors and their shades. The external expression of color is the picturesqueness and colorfulness of color combinations. But the meaning of coloristic decisions is in their use to express the content, the main idea of the author. Therefore, the appearance of certain colors and tones on the picture plane is always motivated and expedient, and they are used for a truthful, expressive, emotionally impressive depiction of reality. It is in
This area gives birth to the true beauty of color, its artistic value (Buimistru, 2010).
A photographer works on the color of color photographs in a completely different way than a painter. But the goal before them is the same, and end result, obtained by various means, has much in common. Both the photographer and the artist strive to convey the truth of life, to reveal the topic picturesquely and expressively. Both operate with colors, achieving color harmony, richness and consistency of color shades (Ivanov-Alliluyev, 1971).
Colors and tones of the subject of photography does not require special evidence to assert that the basis of the coloring of the future photographic image is the colors and tones of the selected subject of photography (Wright, 2010; Wade, 1989).
The chain of mountains (Fig. 26, 27, 28) on the horizon seems to be a bluish color transition to the sky; on the contrary, bright colors, and especially the contrasts of light and dark, prevail next to the observer. When removed, the color seems to “shrink”, giving something like the main mood of the picture. For example, look at a tree: due to the color, its crown seems almost uniform, although individual detailed forms become more and more distinct. If we squint our eyes a little, these detailed shapes become clearer and stronger contrasts of light and dark appear. Our eye zooms in on the big picture. The same thing happens when studying a landscape, in which, with increasing depth of space, the light blue color in the distance mixes into all the color values (refraction of color with blue and white) (Buimistru, 2010; Wade, 1989).

Fig.26.

Fig.27.

Rice. 28.
It turns out that with the help of color and geometric constructions, an entire space can be depicted on the picture plane (Belov, 2012).
As mentioned above, in the section on perspective, objects become smaller as distance increases. It turns out that objects also lose their color brightness; It seems that objects in the distance are shrouded in blue fog. As the viewer gets closer, color contrasts become stronger, contrasts of light and dark are more clearly defined, additional contrasts “overwhelm” the contrasts of warm and cool tones. It follows from this that red, orange, yellow (warm colors) colors act as optical approximators. Cool greens, blues as neutrals, and blues as distancers. Therefore, the blue sky or gray distances are always perceived as distant objects, greenery steadily occupies the middle ground, but what to place in the foreground needs to be thought through. These can be red and brown stones, red
or yellow flowers or other objects in the named color range. It turns out that the foreground is warm, the middle is neutral, and the back is cold (Buimistru. 2010, Belov. 2012).
But the most decisive thing here is observation of the corresponding image situation; due to a uniform change in brightness, for example, the transition from blue to white, an additional impression of spatial depth appears in the frame. Distance (Belov, 2012; Morozov, 1985).
From the above, we can conclude that tonal perspective is one of important means conveying space in the photograph and at the same time an important component of the overall coloring of the photographic work. This way the landscapes do not turn out flat, but on the contrary seem more voluminous. The depth of space appears (Dyko, 1977; Buimistru, 2010).
Good lighting is also of great importance for the beauty of the frame. In this case, the problem of exposure metering arises, so to be on the safe side
complex landscapes with enormous brightness latitude need to be shot with correction: first with the correct exposure, and then, just in case, with two overexposures and two underexposures. For some reason, amateur photographers love to shoot landscapes from 11 a.m. to 3 p.m. in midday light. The sun is almost vertically above the photographer’s head and provides the most unfavorable lighting for the landscape. Professionals shoot only in morning light - from 7 to 11 am or in the evening from 15 to 19 o'clock (at these hours the sun provides beautiful side lighting) (Harman, 2011; Morozov, 1985).
The backlighting that occurs when the oncoming rays of the setting sun is impressive is impressive. In order to set the aperture shutter speed correctly, cover the exposure meter with some object - let it cover the rest of the space except sunbeam(Morozov, 1985; Wright, 2010; Wade, 1989).
Conclusion: competent use of light by a photographer can create a masterpiece from shooting the most ordinary landscape, but inept use can ruin the most beautiful landscapes. Light expresses the mood of nature, which is easily transmitted to the viewer. Bright sunlight gives joyful mood, cloudy weather evokes minor feelings and thoughtfulness, and diffused light in the fog evokes a pleasant feeling of mystery (Belov, 2012).
In addition to all of the above, in landscape, as in any other genre of photography, the composition of the frame is of great importance. To create a harmonious composition of the frame, you need, first of all, to successfully choose the shooting point or move the camera slightly to the side in order to achieve some unexpected effect, capturing new objects in the frame. The basic rules of composition are based on the peculiarities of the gaze of a person, the viewer, who moves across the frame from left to right, stopping in front of the edge. The main rules are to highlight the main thing in the frame. Before taking a photo, you need to calmly examine the landscape and choose the main object on which the photographer’s attention is focused. The photographer determines what images and phenomena in the life of nature he should convey to the viewer (Levkina, 2013; Dyko, 1977).
Golden ratio rule. This rule was also used by the builders of the Egyptian pyramids. It's based on that. That certain points in a painting composition automatically attract the viewer's attention. Regardless of its photo format. There are four such points and they are located at a distance of 3/8 and 5/8 from the corresponding edges of the frame (Fig. 29, 30) (Belov, 2012; Kursky, Feldman, 1981).

Rice. 29.

Rice. 30.
According to the golden ratio rule, you need to place lines and objects not in the middle of the frame. And a little to the side. When applying the golden ratio rule, you need to remember the horizon line. Which should be on one of the lines of horizontal thirds: top or bottom. This rule is called the “rule of thirds” (Fig. 31) (Belov, 2012; Kursky, Feldman, 1981).

Rice. 31.
The horizon line in this photo is at the top horizontal thirds line. The horizon line should not divide the photo into two equal parts. It is necessary to compose the frame so that the sky occupies either one third or two thirds of the frame. The ideal ratio of the proportions of sky and landscape is 1:2, but it is necessary to remember about exceptions (Lapin, 2005; Belov. 2012).
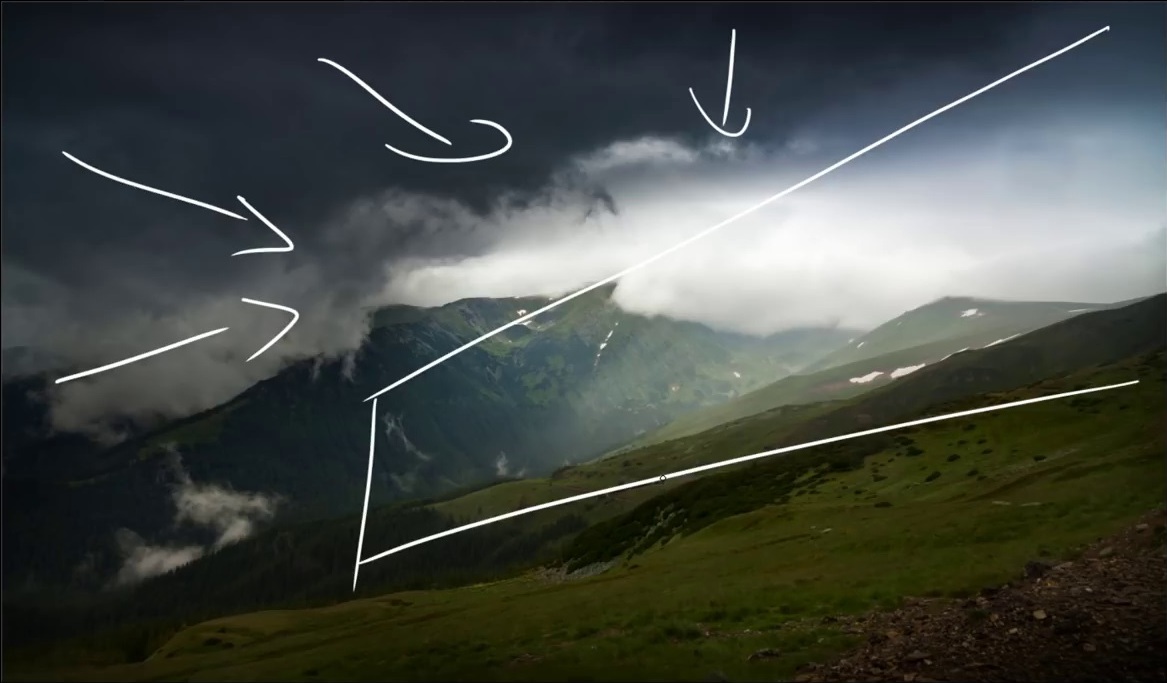
Rule of diagonals. This rule says: important elements images should be set along the diagonals of the frame. The viewer's gaze does not move parallel to the edges of the frame, but diagonally. Consequently, the arrangement of individual lines of the scene along diagonals is perceived harmoniously and allows you to connect the contents of the frame (Dyko, 1977; Levkina, 2013).
Diagonals are either “ascending” or “descending”. Ascending diagonals are directed from the lower left corner to the upper right and carry an optimistic meaning, hope and development (Fig. 32). Descending diagonals directed from the upper left to the lower right corner carry a pessimistic mood, a feeling of completion (Fig. 33) (Dyko, 1977; Levkina, 2013; Belov, 2012).
Rice. 32.
"The Beginning of Life"

Rice. 33.
“Dzhanhot. Road to the sea"

Rice. 34.
The diagonals are represented by mountain slopes.
The main feature of mountain landscapes is that there are more than enough natural diagonals in the mountains (Fig. 34) (Belov, 2012).
If you look around, you will notice that the world around us filled with horizontal-vertical axes, therefore, it is so important and necessary to break this boring order (Fig. 35) (Belov. 2012).
Rice. 35. Rule of frame diagonals. "Rising" diagonal. "Family"

Although landscape photography may seem very simple at first glance, it is actually much more than “point the camera and click the shutter.” The purpose of landscape photography is to convey the inner state, to express something more, and not just to show the landscape in front of you.
We see reality every day. This is why, in my opinion, landscape photography should not simply reproduce it. Objects should not be in front of the viewer or take up the entire photo: the composition should lead the eye to the final point of the photo - the point of interest, your subject.
Like any other art form, landscape photography has its own rules. It takes a lot of time to master lighting, composition, subject selection, post-processing, and the final results will vary from person to person.
There are plenty of videos out there with tips and ideas on this topic, but the bottom line is this: none of it matters unless you get out there and start photographing as much as you can, every day, to figure out what works and what doesn't.
These are 25 tips and ideas for landscape photography. I hope you find them useful (details about each of them are in the video):
1. Shoot the same subject at sunrise and sunset. Different light, different angles, completely different results.

2. A low angle significantly changes the perspective, creating a more interesting shot...a picture you don't see every day.
3. If it’s foggy at dawn, shoot against the light so that the fog is illuminated by the sun’s rays.

4. Silhouettes are best obtained before dawn, with a cloudless sky.
This simple idea, how to create something interesting in an uninteresting moment. All you need is an interesting shape.

5. Dark areas direct the eye to light areas.
6. Long exposures will help tell more about the weather: wind, temperature, cloud movement.
7. If there are dark clouds in the sky, this does not mean you need to stay home.
Light in the gaps between the clouds, through the clouds - a beautiful moment, worth it to capture it.
8. A bright spot of color in a sad gray landscape can make a strong impression on the viewer.

9. Pay attention to the background when you want to highlight your subject, especially when shooting in a forest.
10. Foggy days in winter can seem boring.
But find a lone tree and place it in the center to create emphasis on the subject. Negative space will convey a feeling of great emptiness and how small ABOUT tree on its background.

11. Reflections are always beautiful.
The earth is not always, and reflections can help get rid of unwanted elements.

12. Move the camera while pressing the shutter.
This works best when the subject is clearly separated from the background.

13. Contrast can be very helpful in separating the subject from the background.
A small white flower on green leaves, just highlighted by light, can create a simple but beautiful photo.

14. Panoramas are a wonderful way to convey the scale of a forest landscape.
15. A cloudy sky at sunset may not offer anything...
...or give an almost miracle when the sun's rays break through the clouds for just a second.

16. Sometimes the sky can become a mirror of the landscape - when clouds repeat the lines of objects on the ground.

17. A foggy morning is a wonderful time, especially if at some point the sun breaks through the fog.
Choose a shooting position so that your subject is in the fog, between you and the sun.

18. A light at the end of a forest path when everything else is dark can create a beautiful photo.

19. Best moment for photographing waterfalls - the beginning of spring, when the snow melts in the mountains.

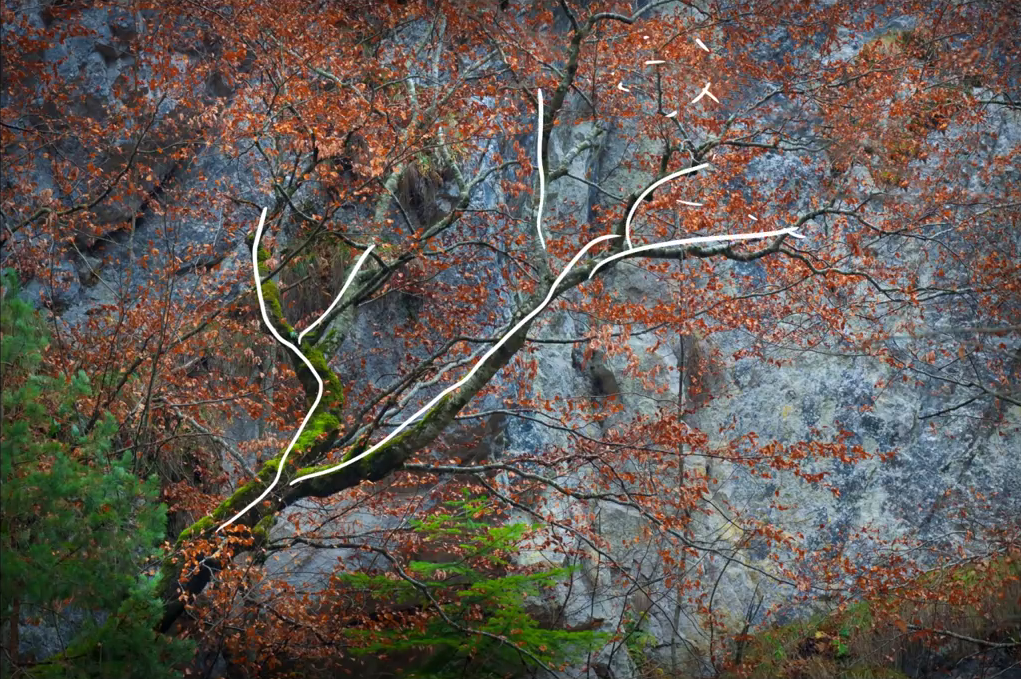
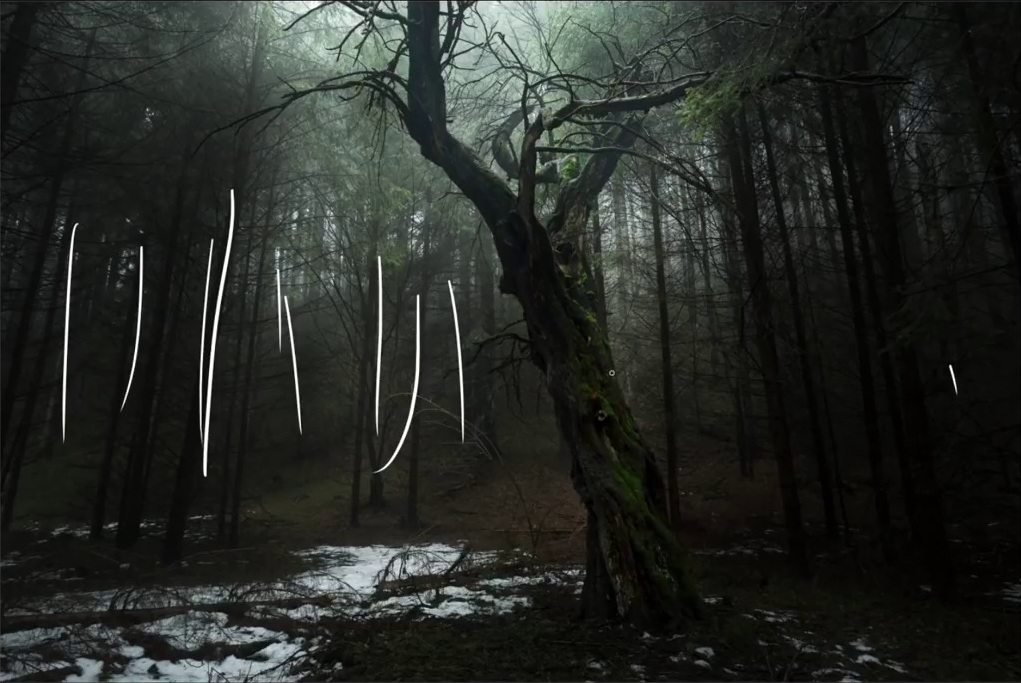
20. Take photos of trees that look unusual... especially old trees.
21. The size of the landscape can be conveyed by the mountains in the background, behind the houses - use a long lens for shooting.

22. When shooting in urban environments, look for complex, dynamic lines. In addition, several vertical plans will give the picture volume.
23. Separate the illuminated area from its surroundings using a long lens for a great photo.

24. When photographing, think about other perspectives - this can give a unique perspective on a simple subject.

25. Don't forget to see the details.
Sometimes a large landscape can distract your attention from more small elements. Textures are a great thing and can look almost like abstract art.

A detailed analysis of all examples is in this video:
I hope you liked the tips and found them useful. Keep shooting - it's the only way to become a better photographer!
About the author: Toma Bonciu is a photographer from Romania specializing in landscape and travel photography. His other works are on his website and pages in
A lot has been written about landscape photography. I don’t want to repeat myself, so here I will describe the main points and focus on the problems that I directly encounter when shooting.
A very short guide to landscape photography:
- Monitor the aperture often, you need to close it tightly to F/5.6-F/16.0
- Keep an eye on the horizon; the horizon should “cut” the frame harmoniously. Carefully and thoughtfully arrange lines and proportions in the frame
- Follow light sources (sun)
- Enjoy the result

As you can see, there is nothing complicated about landscape photography. But the problem is that to get a high-quality photo, you need to work hard:
- The landscape implies that you will need to find it. Finding a good landscape is not always easy. Very often when you find nice landscape, you don't have a camera with you.
- It is best to shoot in the morning and evening, when there is no “hard” (strong) sun. Shooting in strong and hot sunlight is very difficult.
- Since it is best to shoot in the morning and evening, and even with closed apertures, you need a tripod. A tripod means extra costs and extra weight during transportation.
- To catch good shots, you need an internal sense of harmony, which can either be innate or developed over a long time of photographing.

Masters of landscape photography have a very large stock of skills and developments in their arsenal; it is useless to describe them, since every little detail in a trick will be useful only in one case out of a hundred, and the person himself must choose exactly how he needs to shoot in a given situation.

Setting up your camera for landscape photography
- Landscapes are almost always shot with a closed aperture: F5.6-F36.0. The easiest way to do this is in aperture priority mode.
- The ISO value must be set to the minimum: ISO 50, 100, 200,
- Color saturation setting - maximum
- Focusing is best - manual, preferably focusing at infinity (on the farthest object)

Theory is great, but in practical shooting all the simplicity disappears. Firstly, when shooting landscapes, a very serious problem is the effect of overexposure or underexposure of areas in the photo. The most common example is a photo of black earth and white sky. In this case: either the sky will have details, and the ground will be completely black (dark, without details), or the ground will be normally exposed, but the sky will be greatly brightened (overexposed). This has to do with the dynamic range of the camera. A gradient filter helps to solve this problem, which compensates for the difference in the “glow” of the earth and sky. Very often, it is enough to make a correction in order to “save” the frame a little. It can be very useful for landscapes.

Secondly: landscapes are shot with closed (covered) apertures. On digital SLR cameras, with closed apertures, every speck of dust on the matrix will be visible. This is very annoying, frustrating and greatly spoils the photo. For example, already at F11 “blots” appear on the matrix (they can be seen in the examples for this article). On F14, fine dust is already quite visible. You can fight this disease with the help of, or by lowering the aperture number. It's funny, but ordinary digital cameras (point-and-shoot cameras) and film cameras are less susceptible to this disease. On the other hand, soap dishes suffer greatly from diffraction on closed apertures.

Thirdly: often, very visually difficult to compose a shot, so that the lines fit perfectly into the frame. The horizon line is trying to tilt. When I shoot handheld, thoughtfully and carefully, and then look at the footage on the computer, the horizon often “falls” a couple of degrees. For some subjects, even 5 degrees is already an unacceptable error. To overcome the littered horizon, I turn on the “grid” in the viewfinder. The grid displays lines, dividing the frame into 9 or 12 segments, which allows you to immediately see the symmetry in the frame, as well as position the horizon evenly. Almost all Nikon central control systems support a reticle. Some cameras have a virtual horizon (for example), which allows you to control the lines. Well, if there are any problems with lines at all, then you can crop the image by rotating the area in Adobe Photoshop or other editors.

Fourth: for landscapes, most often Need a very wide viewing angle, for this they use wide-angle and . All “ultra-wide” lenses have distortion (curvature of geometry). Distortion can greatly spoil the picture, or it can give it something unusual (such as the fish-eye effect). Still, the less distortion, the better. Unfortunately, all ultra-wide-angle lenses have this disadvantage. Distortion can be overcome using graphic editors; some cameras have built-in distortion correction for a number of lenses (for example,). Or, you can shoot with a longer lens without distortion. Photos of the sky were taken with fifty dollars, this lens does not have distortion.

Personal experience:
If I shoot without a tripod, I use S (priority) mode. I usually set it to a value from 1/80 to 1/200, and I know that the aperture when shooting will be (in good lighting) very closed, which is what is needed for landscapes. In low light, I will still get a fairly sharp shot without blur when shooting handheld. When I use a tripod, I work in mode A or M (aperture priority or manual mode). With a tripod, long shots with closed apertures are not scary. I rarely photograph landscapes, so that’s where my experience ends.

I am often asked, but what is the best aperture for landscape? There is no single answer. Sometimes, to shoot handheld in the evening, F2.8, ISO 800 is enough. And sometimes, to “freeze” a waterfall, you need F/36.0 ISO 100. By the way, at closed apertures, almost all lenses (including the kit one) give a very sharp image, so that there is no point in chasing a specialized landscape lens for home purposes.

Landscape photography becomes much more difficult if you need to photograph a person against the backdrop of nature. In this case, focusing on infinity will not always help. When photographing people in nature, I also recommend monitoring the placement of objects in the frame, and in some cases, it is better to place the person not in the central area of the picture.

Conclusions:
Shooting a landscape isn't hard, it's hard to find good place. The most important thing in a landscape is the harmony of combinations of lines, shapes, light and shadow. To correctly compose (select) a photograph, you just need to go and experiment. In practice, experience comes very quickly.
Don't forget to press the buttons ↓ ↓↓ social networks ↓ ↓↓ – for the site. Thank you for your attention. Arkady Shapoval.
36091 Improving knowledge 0
Landscape photography can be divided into several components, the main ones being landscape photography and cityscape photography. The first part of our lesson will be devoted to landscape photography.
Landscape photography is one of the most difficult and problematic areas of photography. I will say that for me, an experienced photographer, landscape photography still causes difficulties. It's not that difficult from a technical point of view - just have a tripod, a wide-angle lens and pay more attention to exposure. So what makes this type of photography so challenging?
First of all, landscape photography must be approached creatively in order to be able to capture the mood and convey it to the viewer. If the technical side of the issue can be described, then regarding the creative component of photography we can only advise - you need to develop your vision of truly unique photographs.
Equipment
Let's start with the simplest one. Which lens should you choose? Although great photos can be taken with any lens, it is preferable to use wide-angle lenses. They allow you to capture the space of the landscape, emphasized perspective, which adds depth to the image. If you are using a DSLR camera with an APS-C sensor, then pay attention to a wide-angle with a 10-20mm lens; for full-frame cameras there is a choice of lenses with 12-24 mm, 16-35 mm, 17-40 mm. The zoom lens is convenient to use, however best quality Fixed focal length lenses will provide. In the EGF range, 12-24 provides a wide viewing angle, while 16-35 and 17-40 provide a significantly smaller viewing angle, but they provide less optical distortion, especially at the corners of the image. Using ultra-wide-angle and fish-eye lenses will make your photos more expressive and original. But it won’t be interesting to shoot all the frames with just a fisheye lens, so it’s good as an addition to the main lens.

When shooting landscapes, you almost always use small apertures to achieve a large depth of field: typically f/11-f/16. It is recommended to avoid very small apertures such as f/32, as this will reduce image quality due to diffraction (an effect that reduces image sharpness and contrast).
When shooting landscapes, you should only use manual focusing, especially when shooting foreground subjects close to the camera.
ISO sensitivity must be set to the lowest that the camera allows, usually ISO 100-200. It is not recommended to use the ISO 50 expansion available as an option on some cameras due to the reduced dynamic range. Shooting at ISO 100, the image will be virtually noise-free, with a wide dynamic range and excellent image quality, the sharpness of which can be improved during processing without fear of the appearance of strong noise. Shutter Speed: As you can imagine, the combination of a small aperture and low ISO will result in a fast shutter speed. Depending on the lighting, the shutter speed can be from a fraction of a second (1/250 or 1/500) to several seconds or even minutes.
If you are seriously interested in landscape photography, you should understand the need to use a tripod. A tripod is a key element in ensuring sharp, detailed photos, especially with long exposures. Moreover, a tripod allows you to carefully select and think through the composition. Using a tripod, it is possible to use a special technique that allows you to take stunning photos: at sunrise or sunset, take two shots of the same scene - the first one exposed to the sky, the second to the foreground, then combine them - you get an original shot with the widest dynamic range. When shooting handheld, it will be impossible to take two absolutely identical frames.
When shooting landscapes, it is recommended to use filters - polarizing, and . UV and protective filters are not useful as they can reduce image quality, reduce sharpness and increase the likelihood of glare. When choosing filters, it is important to consider that their use on ultra-wide-angle lenses (18 mm or less) can lead to the undesirable effect of uneven illumination of the frame and vignetting.
Preparing for shooting
Much of the success of photography depends on how well you prepare for it. You need to think carefully about what might interfere with the shoot or force you to return. The more possible nuances you take into account, the more likely you are to focus entirely on shooting. Solve organizational issues: how you will get to the shooting location and where you will stay. If you are not planning to stay overnight, you still need to think about the option of spending the night - you may not calculate the time, circumstances may change.

Dress so that your clothes and shoes do not create discomfort. Bring an umbrella or a jacket with a hood. Consider protecting your equipment in case of heavy rain. Have a flashlight at hand. However, try to get out of the forest or mountains before dark, since spending the night there is not the best best option. Purchase a map of the area and use it to navigate objects that cannot be confused. It's also a good idea to have a compass at your disposal.
Don't forget to bring water and food with you. It is better not to go to distant and deserted places alone. Make sure your account is up to date mobile phone there was money and his battery was fully charged. If you go by car, check the spare tire, fill the tank with gasoline, and do not drive away in a faulty car. Tell your friends and relatives where exactly you are going (travelling) and the approximate time you will return.
Before shooting, check your camera settings, battery charge, and memory card space. It is optimal to shoot in RAW with the white balance setting set to auto, then you will select the desired balance in the converter. By using different white balance settings, you can achieve more attractive color reproduction.
Light
Light is an essential element when photographing landscapes. The right light can transform even a dull subject, but the wrong light can ruin even the best scene. It's funny, but many new photographers think that a clear sunny day and cloudless skies are great conditions for photography - but this is not true - they are the worst conditions imaginable for landscape photography. The best light This is not the bright, midday light, but the soft light of sunrise or sunset. Shadows become clear, colors are warm, rich and pleasing to the eye. Experienced photographers call this time.

It takes getting up early and staying up late to capture the landscape in this light, but the results are worth it. Sometimes, you can take fantastic photos before the sun rises - it is quite possible to take beautiful landscape photos even at night. Whenever possible, include the moon in your frame - it will make it more interesting.
If you can't or don't want to wait until sunset or sunrise, shooting at midday is another strategy for getting better lighting. If the sky is cloudless, try to exclude it from the frame as much as possible and, conversely, if the clouds form an intricate pattern, be sure to make the sky part of the composition. In this case, a polarizing filter will help emphasize the contrast between the clouds and the sky and make the colors more saturated.
Another way to get a great shot is in black and white. A photo taken even in low light can be turned into a great photo by converting it to black and white, but not all photos will benefit from desaturation. In black and white mode, frames that are rich in textures, edges and other contrasting elements clearly benefit, while others may look “flat”. In any case, do not hesitate to experiment with contrast during post-processing in a graphics editor (not in-camera!).
Midday photography, sunset or sunrise is not the only time when a photographer can take a quality photo. Even when the sky is overcast or in pouring rain, you can get a great shot. Clouds and stormy skies will add the appropriate mood to the photo and allow you to give landscapes an unusual look.
Mood
The same places can look very different. Weather, time of day and many more various factors influence the environment - it is never the same.
The two pictures show the same waterfall. The first photo was taken in summer, on a sunny day - the waterfall is almost invisible, and the light is not very pleasant. In short, this is a typical photo taken by a typical tourist. The second photo was taken on a day when no one would have thought of visiting this waterfall. A cold autumn day, fog and rainy weather, which intensified the waterfall, filled the photo with a mood - it is mesmerizing.


Don’t be afraid to shoot in the rain or snow - professional lenses and cameras are dust- and moisture-proof (you can find this out from the description of your photographic equipment), and even if not, you can get 100% protection from humidity by purchasing a special plastic or polyethylene casing.

Using a gradient filter, reduce the brightness of an overcast, colorless sky and bring out the texture of the clouds. This will give your photo additional volume. When you include fragments of blue sky in a cloud break, the effect of a gradient filter on them will be equivalent to the effect of a polarizing filter.
Seasons
Each season brings its own gifts to photographers, so don’t put off landscape photography until your summer vacation.
SHOOTING IN AUTUMN, IN CLOUDY WEATHER
When photographing rain, you need to stop your lens down a lot to shoot at slow shutter speeds. In this case, the raindrops will appear in the form of stripes, which will create the impression of rainy weather in the photo. You just need to make sure that raindrops do not get on the lens. Drops will cause the image to become blurry.

Spectacular landscapes can be captured in foggy weather. The impression of fog can be enhanced by placing a mesh of rare silk fabric in front of the lens. To convey the depth of space, you need to place some dark object in the frame in the foreground.
WINTER LANDSCAPE
On bright, sunny days, the contrast of the landscape is very high, which is caused by the combination of dazzlingly bright highlights on the snow and, say, dark trees, especially conifers.
It is better to photograph a winter landscape in the morning or evening hours, when the slanting rays of the sun create elongated shadows - this enlivens the composition and well emphasizes the texture of the snow.

The snow in a winter photo should be well detailed. Therefore, when photographing a landscape in which snow occupies most of frame, exposure is determined by measuring the brightness of the snow. If snow and dark objects in the subject are equivalent from a pictorial point of view, exposure is determined by their average brightness, but taking into account greater detail in the snow compared to dark objects.
Composition
1. Rule of thirds
Good composition is an essential part of landscape photography, but it is the most difficult task. There are a few "rules" that will help you improve your composition, but you must constantly develop a "creative" eye in order to get decent shots.
The most common mistake novice photographers make is placing the horizon line in the center of the frame - resulting in a static and unbalanced image. The first step to improving your composition is to shoot the landscape using the rule of thirds. We have already looked at it in our previous lessons on composition, but it would be useful to remind you. It's very simple - mentally divide the frame into three parts horizontally. And shoot in proportions of 1/3 foreground, 2/3 sky, or vice versa - 2/3 foreground, and 1/3 sky. In other words, create an asymmetrical composition.

Naturally, the rule of thirds will not be a panacea for all photographs, but it is worth remembering.
2. Foreground and perspective
One of the most effective ways to create a strong composition is to use a wide angle of view and place an object (a flower, a rock, etc.) in the foreground. This object, combined with the enhanced perspective of a wide-angle lens, will give a sense of depth.
The depth of field should include all objects. Therefore, it is recommended to set the aperture to f/11 or f/16.
3. Other elements of the composition
There are many elements in nature that help create an expressive composition - diagonals are the most influential of them. Use diagonal lines to draw the viewer's attention to the subject. If you take a closer look, you will see that everything around is subject to certain guidelines. Look for guidelines and try to fit them into the composition.

Patterns (repeating shapes) and textures are other elements in composition. It’s not easy to see natural patterns in nature, but different textures are often found: small particles of sand, tree bark, stones and many other interesting objects will help make the photo more interesting.
The main thing in the frame
Determine what will be the main thing in the frame. It could be a lonely tree, a rock, a mountain, a picturesque forest, a slope, a road. Using the composition grid on the LCD screen (in the viewfinder), divide the frame into thirds and position the main subject at the intersection of the vertical and horizontal grid lines.
Try to make sure that there are three plans in the photo: foreground, middle and distant - this way the landscape will look more voluminous and the space will be better conveyed. The foreground should be drawn clearly and in detail, the background may well be blurry, hidden by atmospheric haze.
Try not to make the landscape “empty”. It is better to fill empty space if possible. In the sky, this filler can be clouds. In the foreground are bushes, tall grass, stones, leaves, branches, animals.

Don’t try to fit everything you see into one frame at once; get rid of the random and monotonous space that inexpressively fills most of the frame - water, sky, foliage. Leave only the most important, beautiful and interesting things. Look for open places in the forest.
Too thick foliage and branches create variegation, small highlights and very thick shadows that look like “black gaps” in the photograph - such pictures look worse than a carefully thought-out composition.
If you can't find the fill, crop the image to highlight a more interesting part of the landscape. You can walk a little and take different pictures - straight or at an angle, from the lowest point. Climb a hill, a slide, any building - from there you can make a multi-dimensional spatial panoramic shot.
When choosing a subject, look for the main element of the landscape that will be emphasized, as well as the way in which the surroundings will emphasize and complement it. When composing the frame, make sure that the subject fits harmoniously into the plot. For example, a tree should not grow from the bottom edge of the frame - leave some space at the bottom; do not cut off the top of the mountain, leave a little “air”.
When photographing a landscape, always pay attention to the fragments, because it is not at all necessary to shoot only general plans. A careful look can highlight an interesting part of the landscape, beautiful and expressive details. But don’t get carried away with strong zooming - here you need to preserve the integrity of the fragment, otherwise the picture will turn out to be an abstract piece torn from the general plan, devoid of meaning.
Panorama
Finally, practice taking panoramas. Here you should follow several rules. All future frames of your panorama should be at the same scale of the subject, so don't focus closer or farther away from it. The aperture value should be left constant. The shots need to be taken with some overlap on each other. Otherwise, due to the lack of information at the edges of the frames, the panorama stitching program will not be able to assemble the final image.

You can use your camera's bracketing feature to avoid exposure errors.
Shooting water
If you need to photograph water covered with ripples or a small wave, then it is taken with counter-lateral lighting at an angle of 35-45° to the optical axis of the lens.
Water against the light is photographed when the rays from the sun, hidden by a cloud, fall on the water, creating expressive shiny stripes. But you need to make sure that the sun does not fall into the field of view of the lens.
It is better to shoot the sea from a high point. Then the water space occupies a significant part of the frame, and the photograph turns out to be more expressive.
The surf is usually photographed from a low point with a shutter speed of at least 1/1000 s.

It is better to shoot flowing water with a short shutter speed. In this case, a slight blurring of the image occurs, which creates the impression of water movement.
Mountain landscape
In the mountains it is better to shoot early in the morning. During these hours, the air is transmitted most effectively. Cloudy weather also makes for more expressive photos.
On sunny days, the subject must be chosen with a dark foreground, the brightness of which determines the exposure. In this case, the distances will be somewhat overexposed and appear lighter in the print than the foreground, which will emphasize the depth of space and fill the landscape with a feeling of air and spaciousness.
Side lighting is considered the best, as it emphasizes the shape of the mountains, and the haze illuminated by oblique rays creates the impression of depth. When the sun is behind the camera, the image becomes flat. When taken from the front, the picture turns out to be very contrasty, details, especially in the foreground, disappear.

Photographing mountain landscape During the day, when the sun is high, it reveals image details without sufficient contrast.
When determining exposure, it is necessary to take into account that the intensity increases with altitude in the mountains. solar lighting, and it takes on a different character than on the plain. With height, the brightness of the shadows decreases and the brightness of the light areas of the landscape increases. Therefore, when shooting in the distance without a foreground, the shutter speed is reduced compared to shooting on flat terrain: at an altitude of 500 m by 1/4, 1000 m by 1/2, 2000 m by 3/4, 3000 m by half.
To get highlights on the surface of the glacier, you should photograph in backlight.
The main question of the topic: how to learn to see beautiful landscapes?
A beautiful landscape is built on the fact that the plot unites everything in the frame and subordinates the environment to a common idea - the author’s thought, creating a certain mood, emotions, and conclusions in the viewer.
Good luck to you and all your photography!
At first glance, landscape photography is a very simple type of photography. It seems that all you have to do is go outside with your camera, choose a worthy subject and press the shutter button. However, when you see your first shots, you may be disappointed. Below you will learn what to pay attention to when photographing a landscape and how to get great photos.
Landscape Lens
Let's start with the fact that there are no lenses designed exclusively for landscape photography. The image taken with a long-focus lens has less geometric distortion, but, unfortunately, also a smaller viewing angle. Short-focus (wide-angle) optics are suitable when you need to get a larger viewing angle, depth of perspective, or build a panoramic image. At the same time, the geometric distortions of perspective inherent in such lenses can be used as an artistic effect. For landscape photography, you can purchase wide-angle lenses with a fixed focal length, such as 14 or 18 mm. An alternative and cheaper option would be to purchase a zoom lens (10-20mm, 12-24mm, 18-35mm). Finally, you can also use a kit lens (18-55mm), which gives you more flexibility in choosing your subject and is an excellent choice for a beginning photographer.
It should be noted that lenses designed for narrow format cameras have a scale of focal lengths in terms of angle of view for a standard 35 mm film frame. Therefore, to evaluate the viewing angle of the lens for your digital camera, it is necessary to take into account its crop factor.
Light filters
In addition to the lens, you will need filters for landscape photography. They will significantly improve your photos. For landscape photography, it is best to use gradient and polarizing filters.
A gradient filter, the top part of which is dark and the bottom part is completely transparent. A gradient filter allows you to dim the brightness of a whitened, featureless sky or emphasize its texture in cloudy weather.
A polarizing filter is used in cases where you need to highlight the blue sky, clouds against its background, or especially emphasize reflections in water.
When choosing filters, it is important to consider that their use on ultra-wide-angle lenses (18 mm or less) can lead to the undesirable effect of uneven illumination of the frame and vignetting.
Composition
Before you start shooting, you need to remember the basic rules for constructing a composition. Try not to place the horizon line exactly in the middle of the frame. It is advisable to build the composition in such a way that it is closer to the top or bottom third of the frame. Avoid a central arrangement of objects that you focus on. Since ancient times, the rules have been well known according to which an object located near the point of the “golden section” has the most harmonious perception. Mentally dividing the frame into three equal parts, two vertical and two horizontal lines, compose your frame so that the accentuated object is in the area of one of their intersection points. If there are several such objects, never place them on the same line.
|
|


When shooting a landscape, divide the frame into three well-defined plans - foreground, middle and background. With this composition, your photo will acquire the necessary volume.
Light
Watch the lighting. The most favorable time for shooting is before 10 a.m. and after 5 p.m. (in autumn and winter, these boundaries naturally narrow). At this time, the lighting is softest and most even. Use a polarizing filter to expose clear, cloudless sky. With it, you can achieve a deep and soft gradient: from light smoky to deep, velvety shades (Photo 1).
Using a gradient filter, reduce the brightness of an overcast, colorless sky and bring out the texture of the clouds. This will give your photo additional volume. When including fragments of blue sky in a cloud break, the effect of the gradient filter on them will be equivalent to the effect of a polarizing filter (Photo 2).
Try not to overload your frame with unnecessary details. Sometimes the simplest composition can add volume to a frame. For example, in this frame (Photo 3), with the help of people, it was possible to revive the composition, and with the help of just one detail - a stone in the foreground, arranged near the point of the “golden ratio” - to achieve volume.
Feel free to experiment with metering, especially in difficult lighting conditions. In landscape photography, maximum depth of field is very important, so when shooting handheld, it is preferable to set the aperture to F8–11, and if you have a tripod, you can reduce it to F22.
Panoramas
Finally, practice taking panoramas. Here you should follow several rules. All future frames of your panorama should be at the same scale of the subject, so don't focus closer or farther away from it. The aperture value should be left constant. The shots need to be taken with some overlap on each other. Otherwise, due to the lack of information at the edges of the frames, the panorama stitching program will not be able to assemble the final image. You can use your camera's bracketing feature to avoid exposure errors.

As an example (Photo 4), we can give a panorama assembled from two frames with a relative aperture of F8 and a lens focal length of 28 mm. The lens was focused at infinity, and the shutter speed on all frames was 1/125 of a second.